Laird Connectivity is now Ezurio
The Sentrius™ Sensor mobile application is a simple, intuitive utility that enables a user to fully explore the innovative features of Laird’s SentriusTM RS1xx Sensor platform. It provides an easy to use wireless commissioning interface for LoRa keys configuration to the Sensor. The rich feature set enables users to configure both BLE and LoRa radio interfaces, configure Temperature & Humidity Sensors, analyse and troubleshoot wireless interfaces, display sensor data over time and even update the device firmware OTA.
Requirements
- SentriusTM RS1xx Sensor Module
- Apple iPhone or Android smartphone
- SentriusTM Sensor App (available in the Google Play store and the iTunes App Store)
Connect to the Sensor
1. Download the Sentrius Sensor App
On your Android or iOS device, search your app store for Sentrius Sensor App. Install the app on your device, and launch the app. The application waits for nearby SentriusTM devices to power on and broadcast.
2. Broadcast the Sentrius RS1xx Sensor
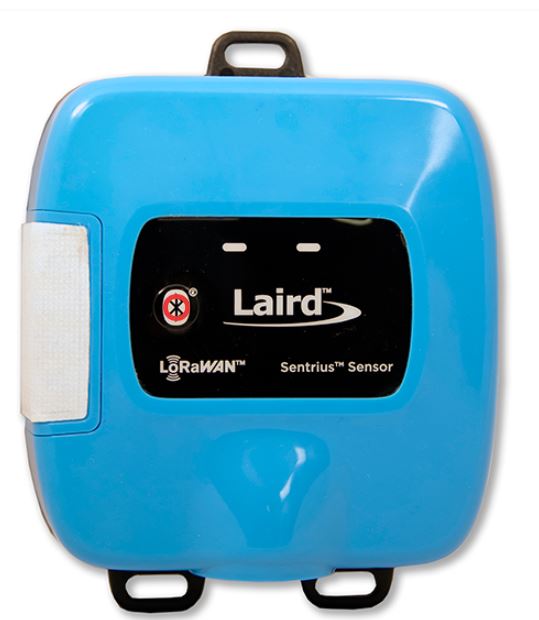
On the Sentrius Sensor, press the Bluetooth Button (highlighted below). The Sentrius Sensor begins advertising and becomes connectable.
3. Select the Sentrius Sensor in the Mobile App
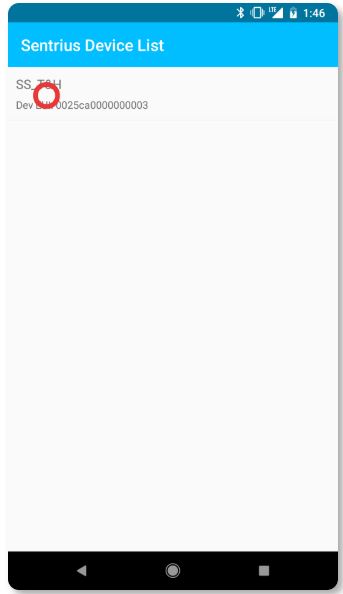
The sensor becomes discoverable in the Sentrius Sensor mobile app. The device can be recognized by the DevEUI printed on the package label. Look for this DevEUI in the device list in the mobile app, as shown below. Tap the device listing to connect.
4. Main Menu
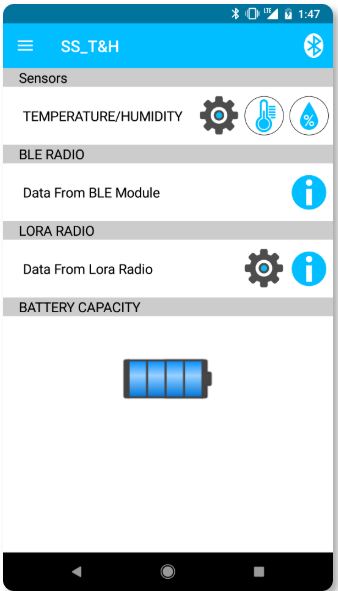
The main menu appears as shown below. The main menu has several sections:
- Sensors: Shows a list of connected devices
- BLE Radio: Provides information on the BLE connection
- LoRa Radio: Provides information on the LoRa connection
From the main menu, you may read sensor data, configure sensor behavior, update firmware, and more.
Configure the Sensor
1. Sensor Behavior Settings
The sensor behaviour settings allow you to configure the read period, temperature and humidity thresholds, and more. To configure, click the gear icon in the Sensors panel. This opens the settings panel.
The Device Settings panel allows you to configure several settings:
- Read Period: How often the sensor is read, in seconds.
- Reading Aggregation: How many Read Perios to collect before sending a packet.
- Temperature Thresholds: High and Low temperature values that trigger an alarm message. If alarm is enabled, the sensor will immediately send data to the server.
- Humitidy Thresholds: High and Low humidity values that trigger an alarm message. If alarm is enabled, the sensor will immediately send data to the server.
- Alarm Enables: Enable or disable the alarms for temperature and humidity.

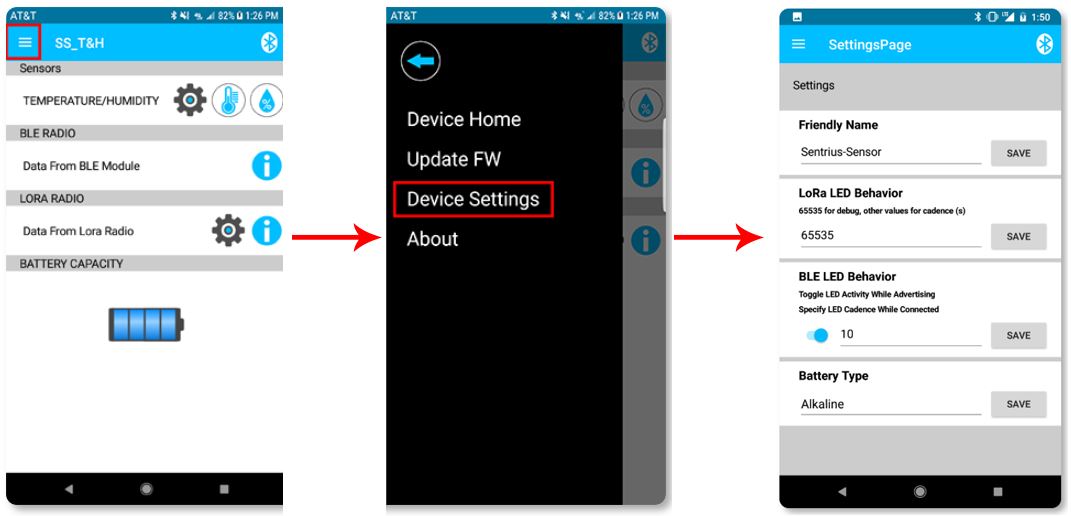
2. Device Settings
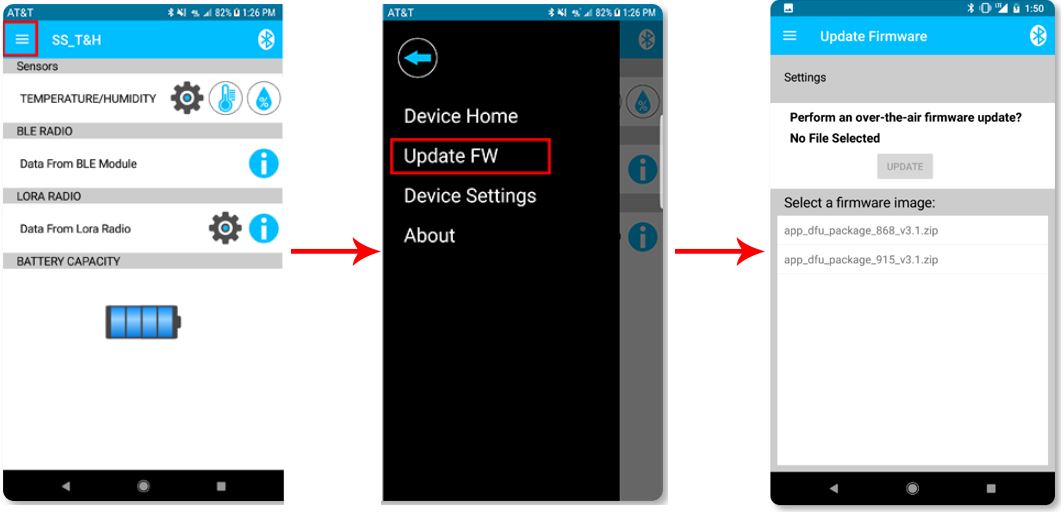
The device settings allow you to configure device-level properties, such as the friendly name of the sensor, LoRa LED behavior, and more. To configure device settings, click the tripanel button at the top left of the main menu, then click Device Settings.
This opens the Device Settings screen. The Device Settings screen allows you to configure several settings:
- Friendly Name: The name that the device broadcasts over Bluetooth.
- LoRa/BLE LED behavior: Used to control the cadence of the heartbeat LED (time in seconds). For example, a setting of 10 flashes the appropriate LED every ten seconds. A setting of 0 turns off the LED. With a setting of 65535, the device flashes the green LED during transmit and the orange LED during receive.
- Battery Type: Selects the type of power cell for the sensor.
- Battery Capacity: Shows the remaining power capacity of the sensor.
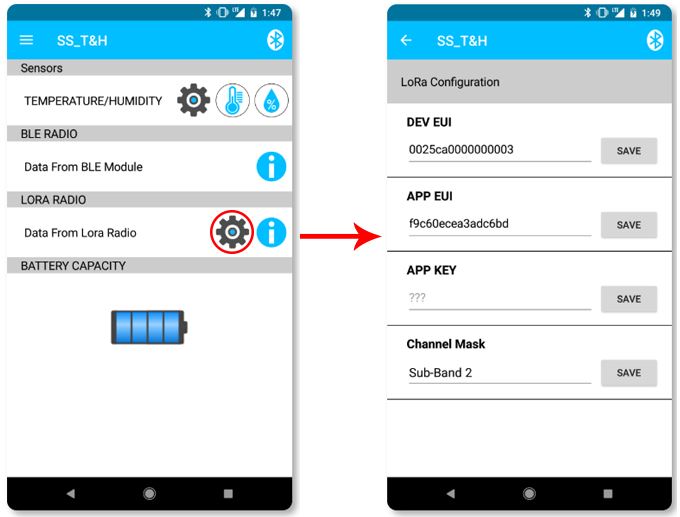
3. LoRa Configuration
Typically done via a cabled method, the LoRa configuration screen allows users to fully commission their Sentrius Sensor wirelessly via BLE. To configure LoRa features, click the settings near in the LoRa Radio panel. This opens the device settings screen.
Note, for US and the TTN set the channel mask to 0x000000000000FF00. For EU set it to 0x00000000000000FF (this is not used in the EU case, but the firmware expects every field on this page to be valid before proceeding to the Join Request).
Viewing Sentrius Sensor Data
1. Reading Temperature and Humidity Data
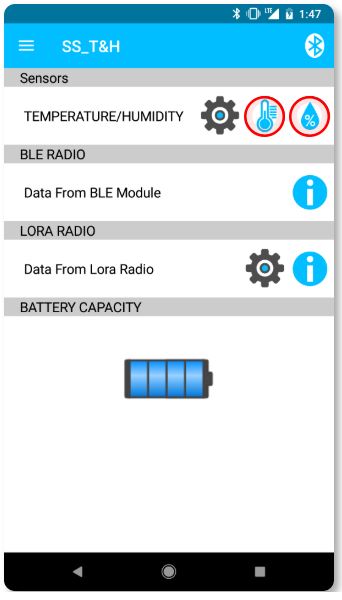
From the main menu of the SentriusTM Sensor app, you can read the data being logged by the sensor as a graph over time.
To read this data, press either the Temperature or the Humidity buttons on the main menu.
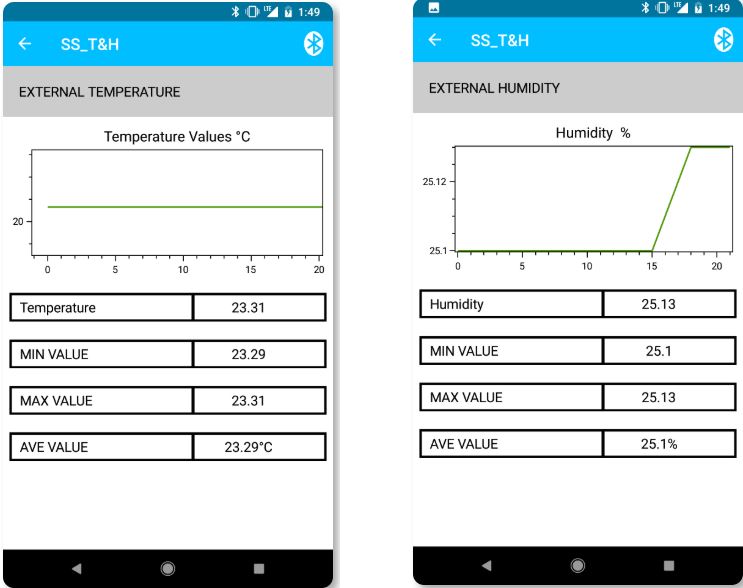
The temperature and humidity data display as shown below.
Over-the-Air Firmware Update
1. Updating Firmware
It is possible to update the firmware of the Sentrius Sensor over the air via your mobile device. To update firmware, click the tripanel button at the top left of the main menu, then click Update FW. This opens the Update Firmware screen.
From the Update Firmware screen, you can select a firmware build from the list, which is provided from the web, and update the sensor's firmware by clicking Update.