Laird Connectivity is now Ezurio
This guide will walk you through quickly getting connected with your DVK-BL652.
1. Download the ModuleLink App
Download the ModuleLink for BLE app that corresponds to your phone/tablet.
After installing the app, enable Bluetooth. Once Bluetooth is enabled, open the ModuleLink app.
2. Download sample smartBASIC Applications
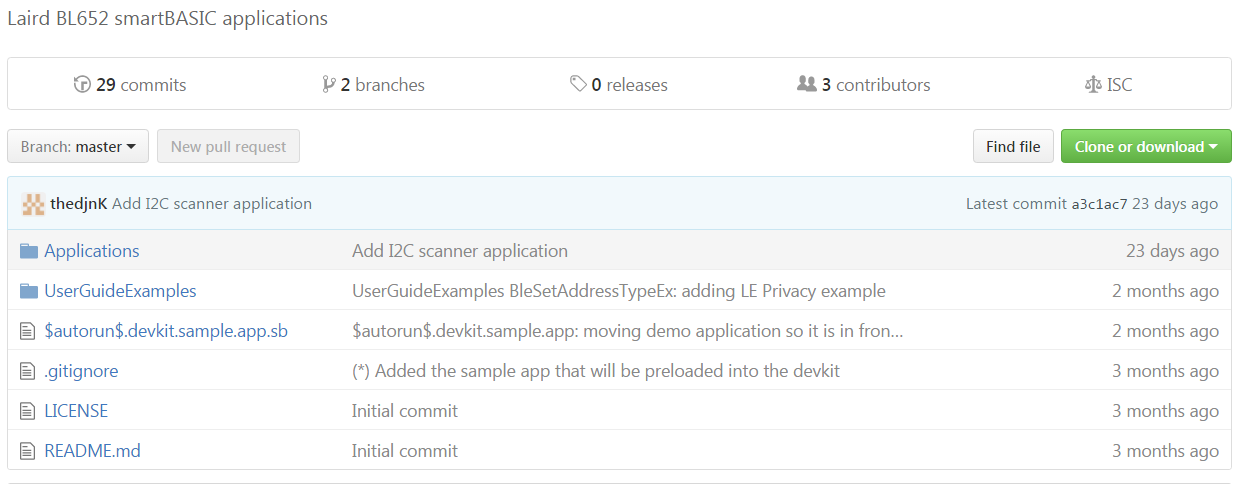
Note: If you have upgraded your BL652 firmware to version 28.7.3.0, please follow this link to get the latest smartBASIC apps: https://github.com/LairdCP/BL652-Applications
For firmware older than v28.7.3.0, please follow this link for smartBASIC apps:
https://github.com/LairdCP/BL652-Applications/tree/B_bl652_v28_6_2_0
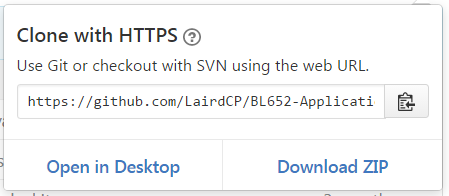
Click Clone or Download.
Select Download ZIP in the popup window.
Extract the files from the zipped file in Windows Explorer by right-clicking the file and clicking Extract All.

3. Prepare the DVK-BL652
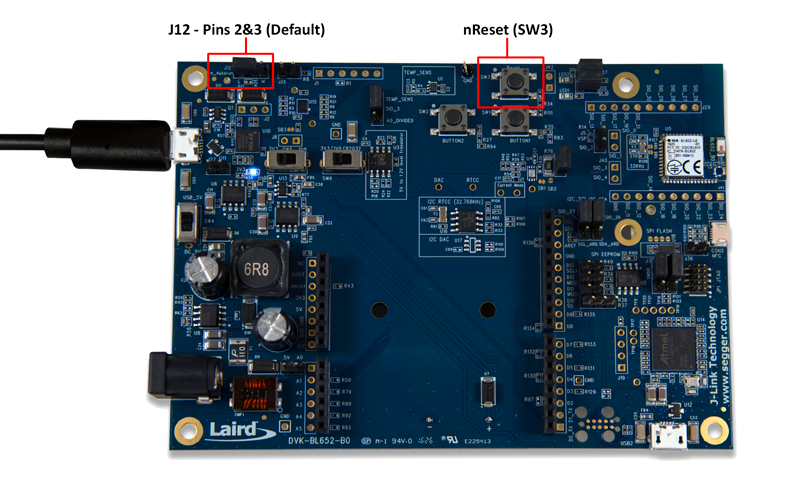
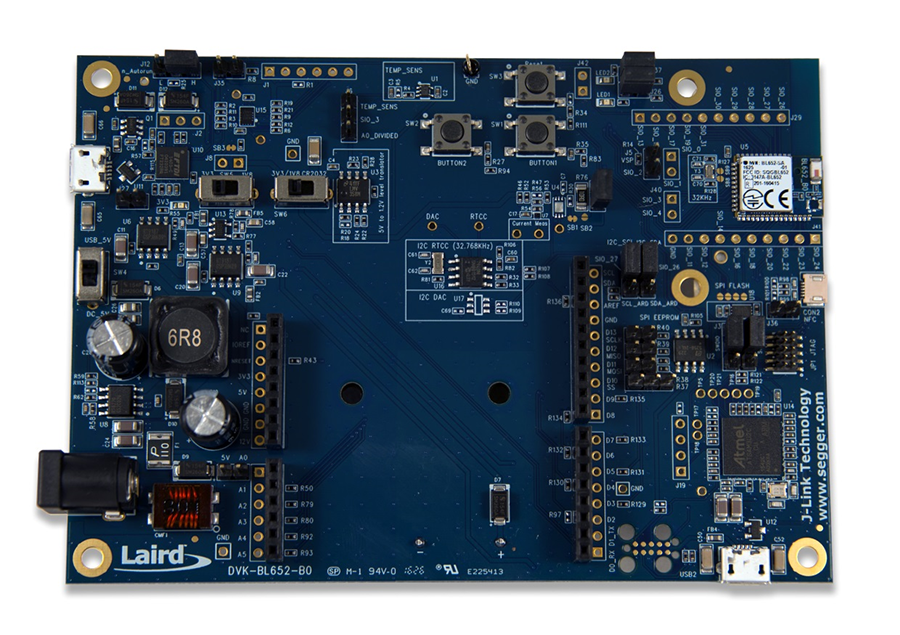
Apply power to the DVK-BL652 by connecting it via USB to your PC. Please ensure you use the correct USB port, the one on the upper left side of the board.
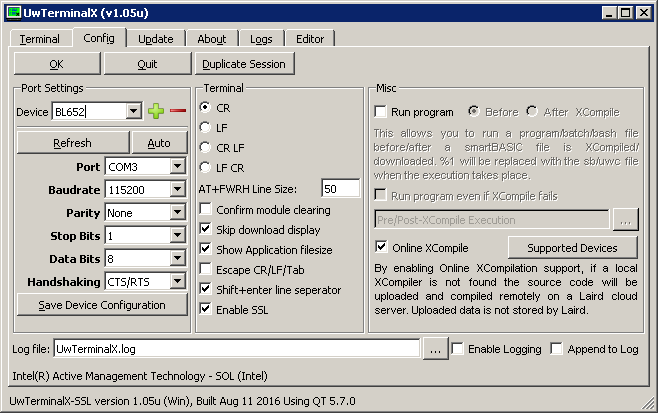
4. Prepare UwTerminalX
Download and install UwTerminalX (preferred v1.06 or higher), avaliable here.
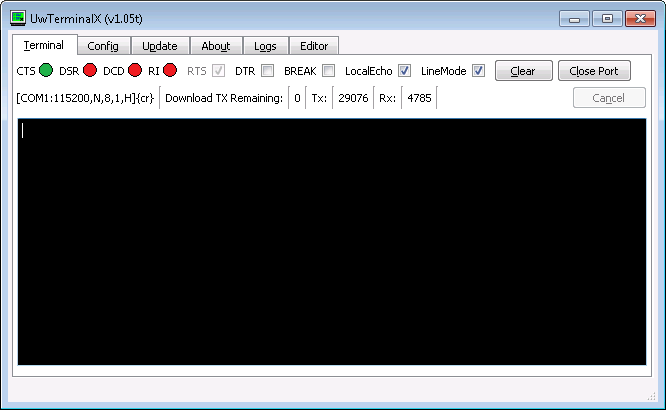
Open UwTerminalX. After accepting the license terms, you will be able to select the BL652 device from the device dropdown list.
On older versions of UwTerminalX, the BL652 may not be selectable. You can manually set the connection parameters (115200 baud, 8 data bits, 1 stop bit, and hardware flow control).
Select the COM port used for the BL652 (which can be found in your PC settings, such as Windows device manager) and click OK.
5. Compile and load the Dev Kit Sample Application
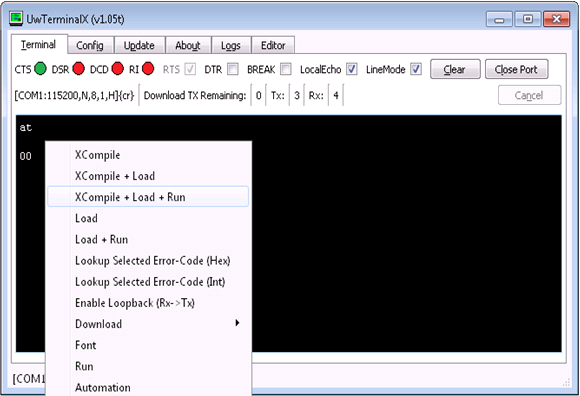
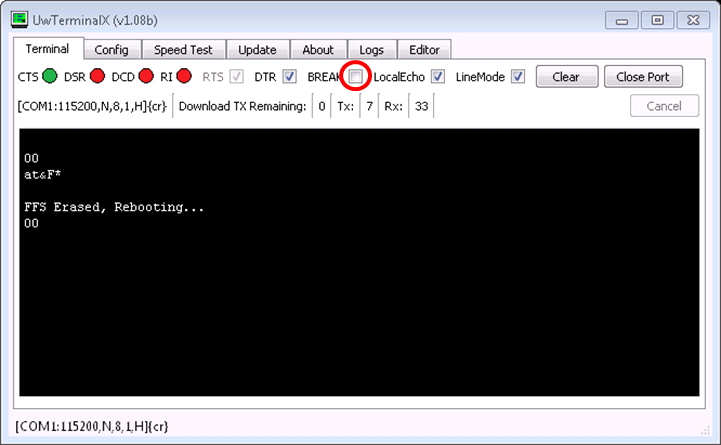
Ensure the module is in interactive mode and the file system is empty by completing the following two steps:
- Press the Reset button on the module (or tick and untick the Break checkbox, which resets the module).
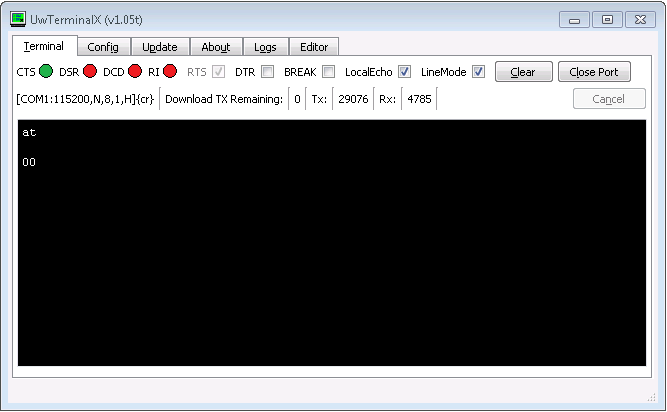
- Type at&f* and hit Enter as shown.
Right click the terminal window and select XCompile+Load+Run.
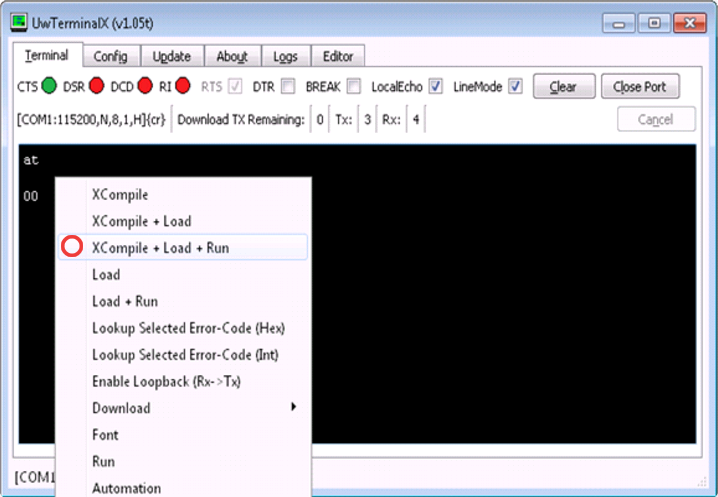
Select the $autorun$.devkit.sample.app from the extracted folder.

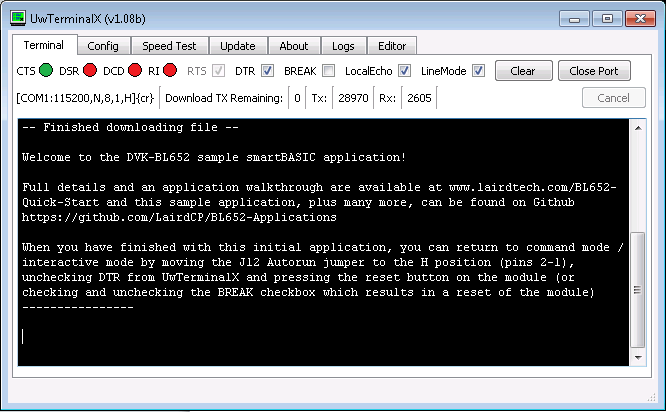
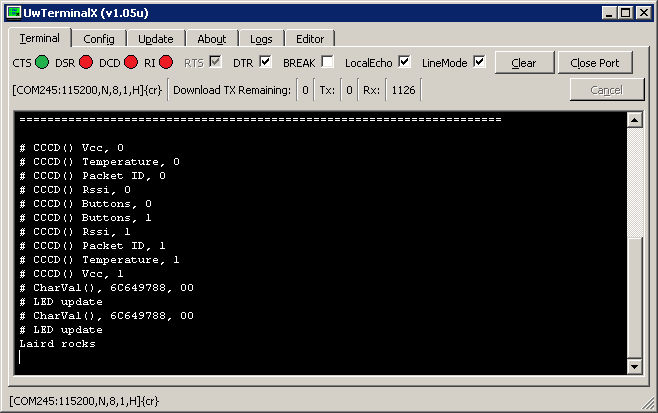
When the application is finished compiling and the app is running, UwTerminalX displays a welcome message as shown.
6. Connect to the DVK-BL652
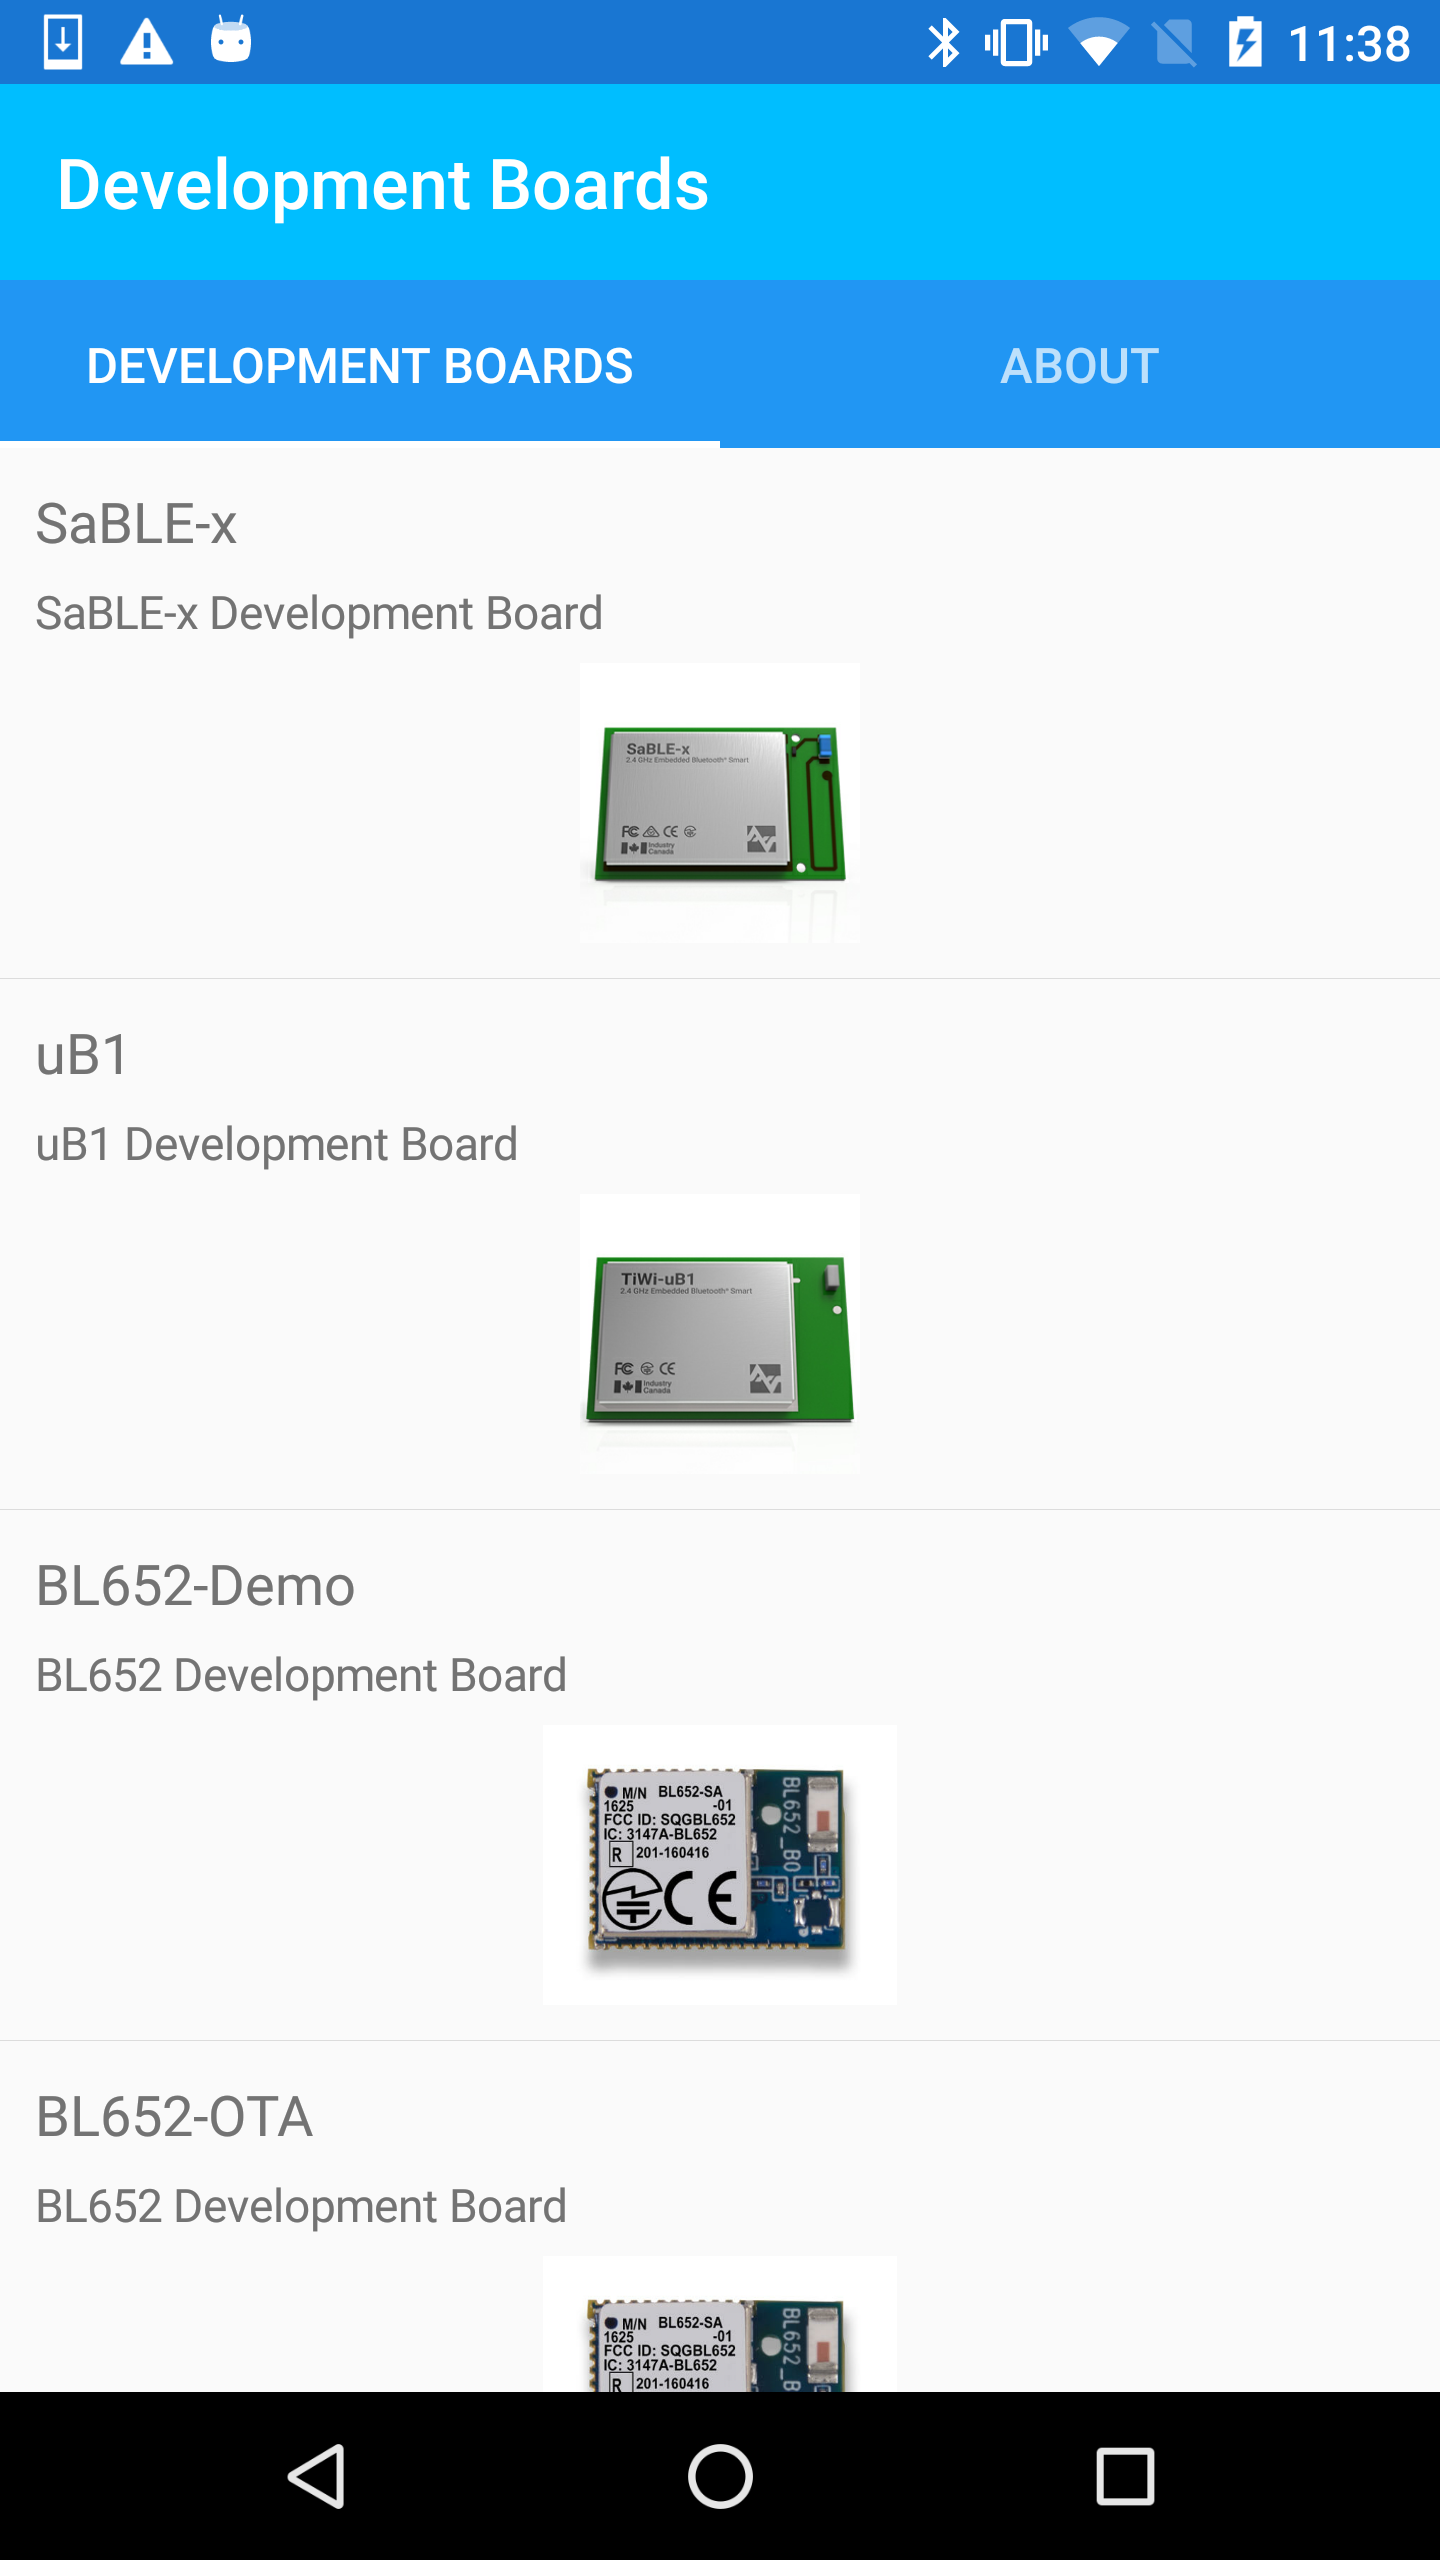
In the mobile app, tap on BL652-Demo to select the demo mode of the ModuleLink application.
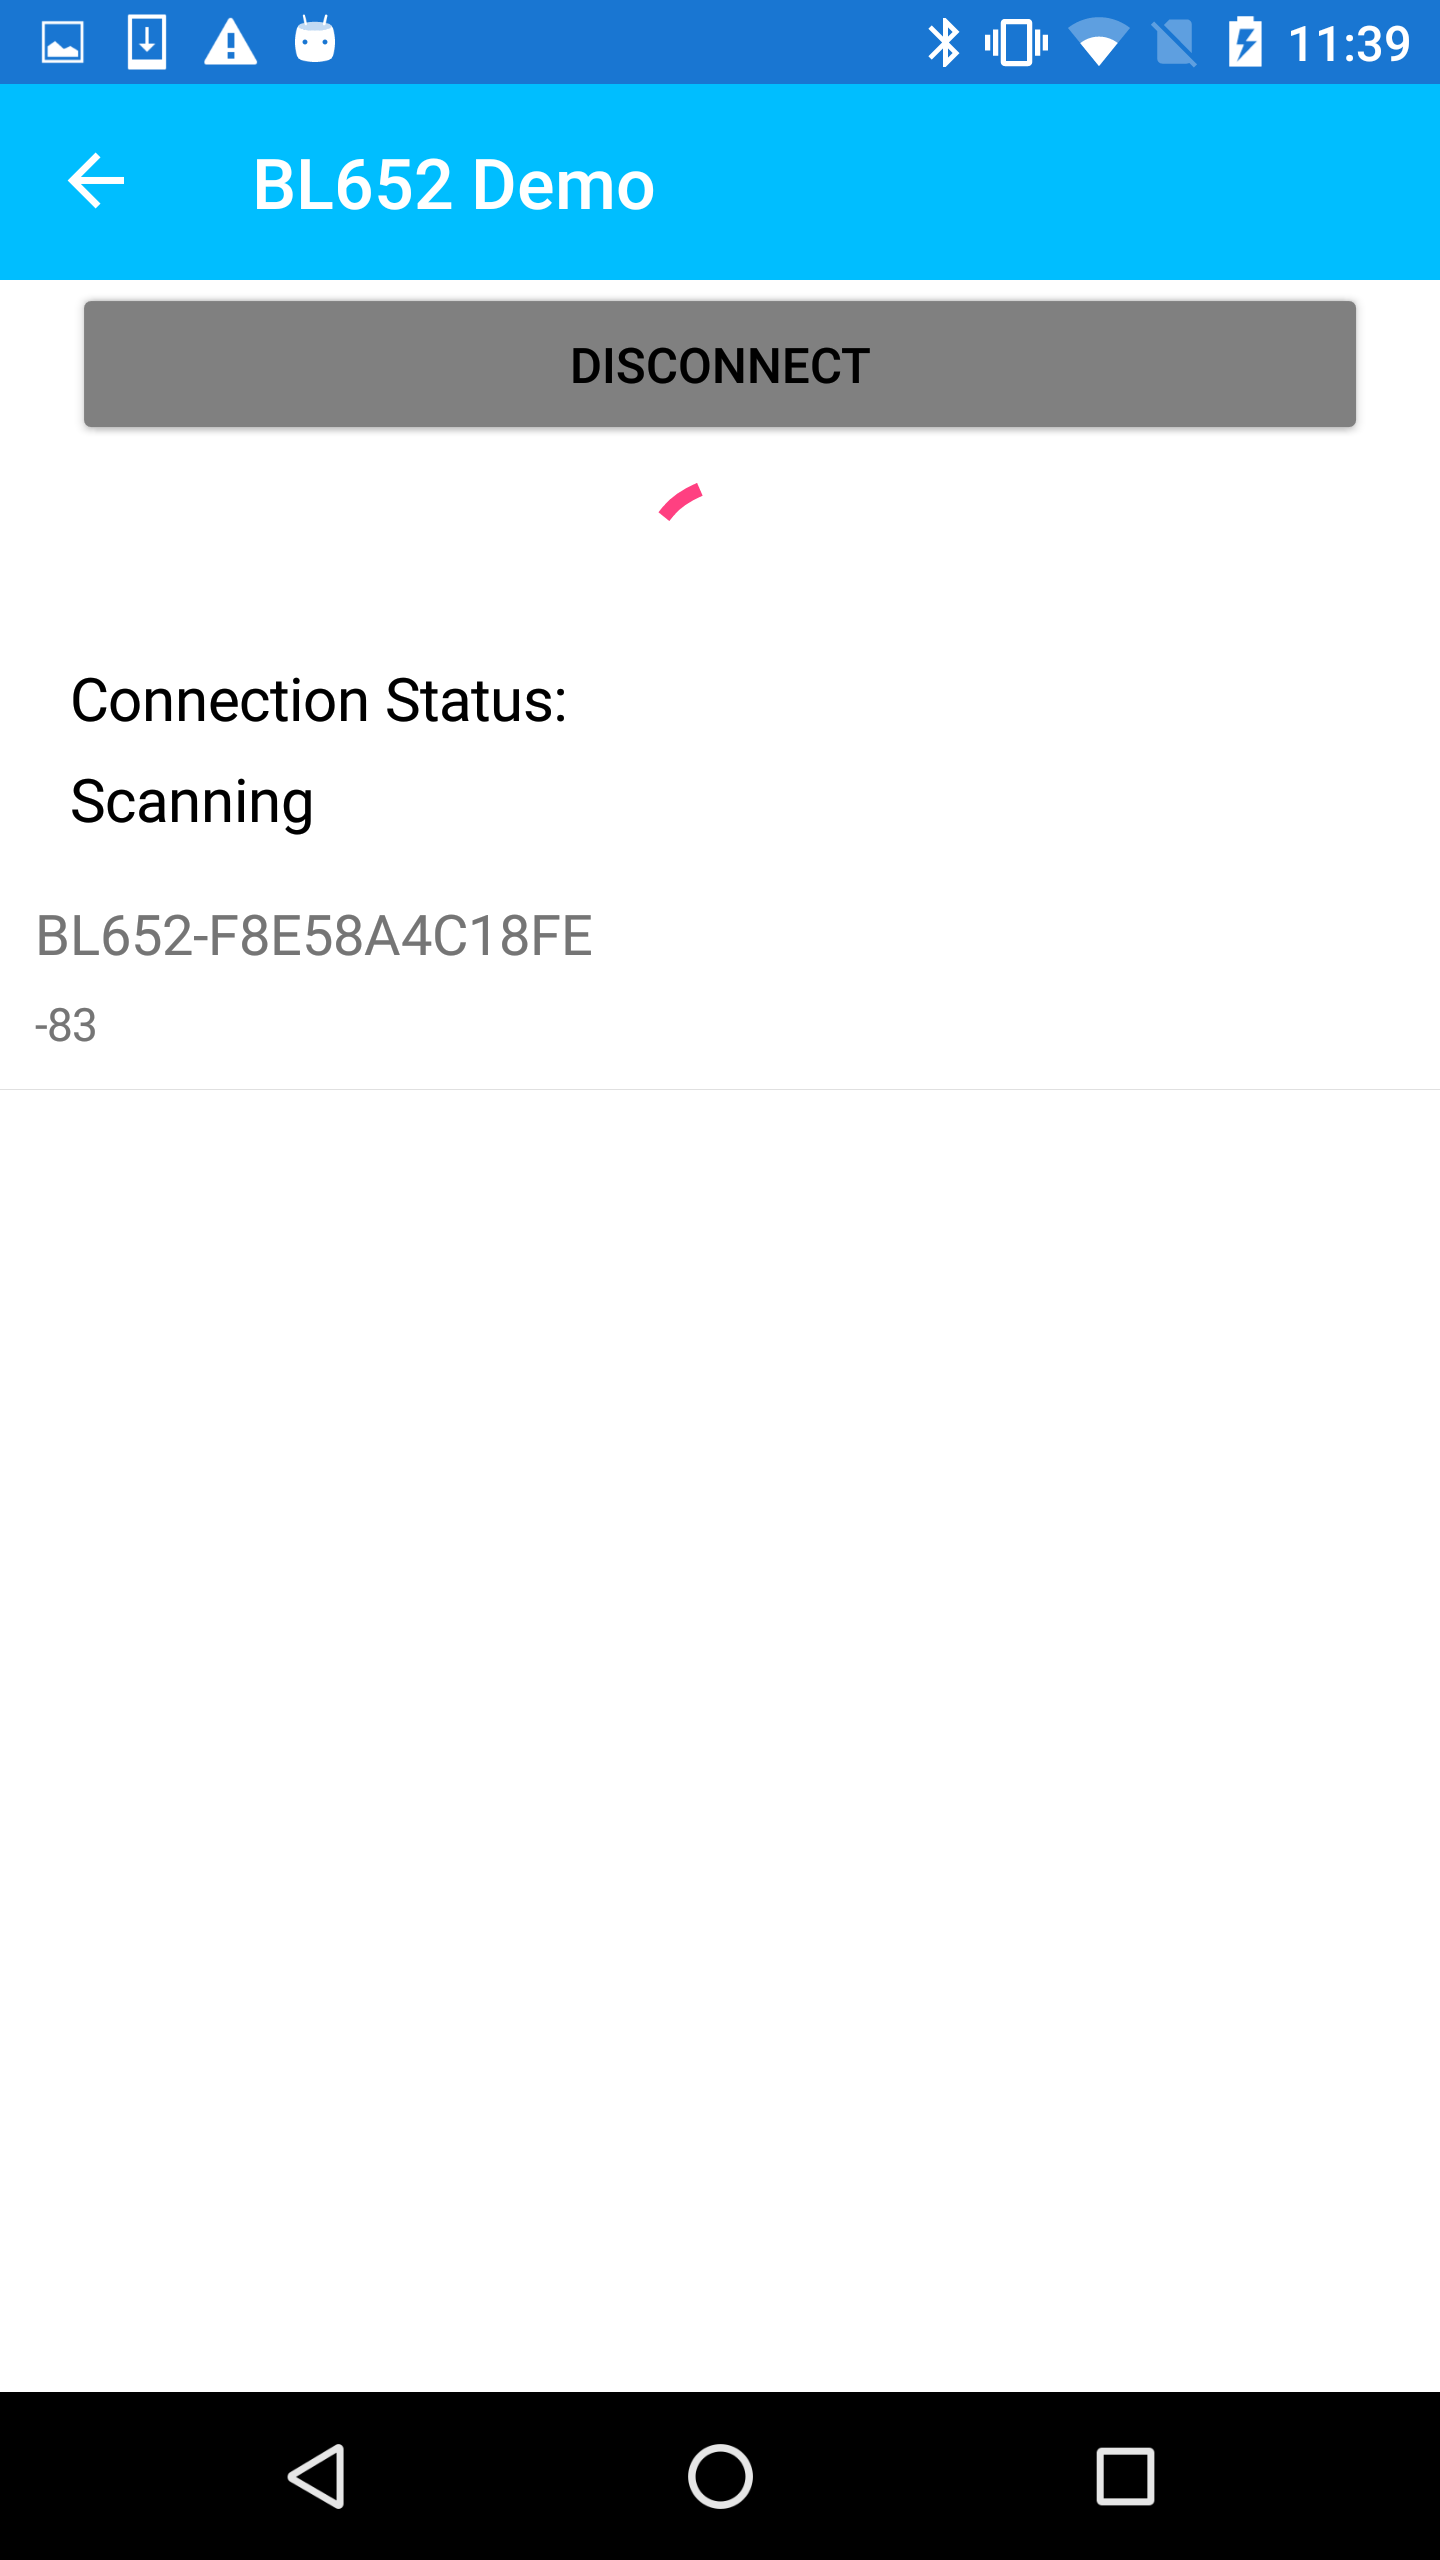
The application will begin to search for your nearby DVK-BL652. Once your device is discovered, tap on it to connect to it.
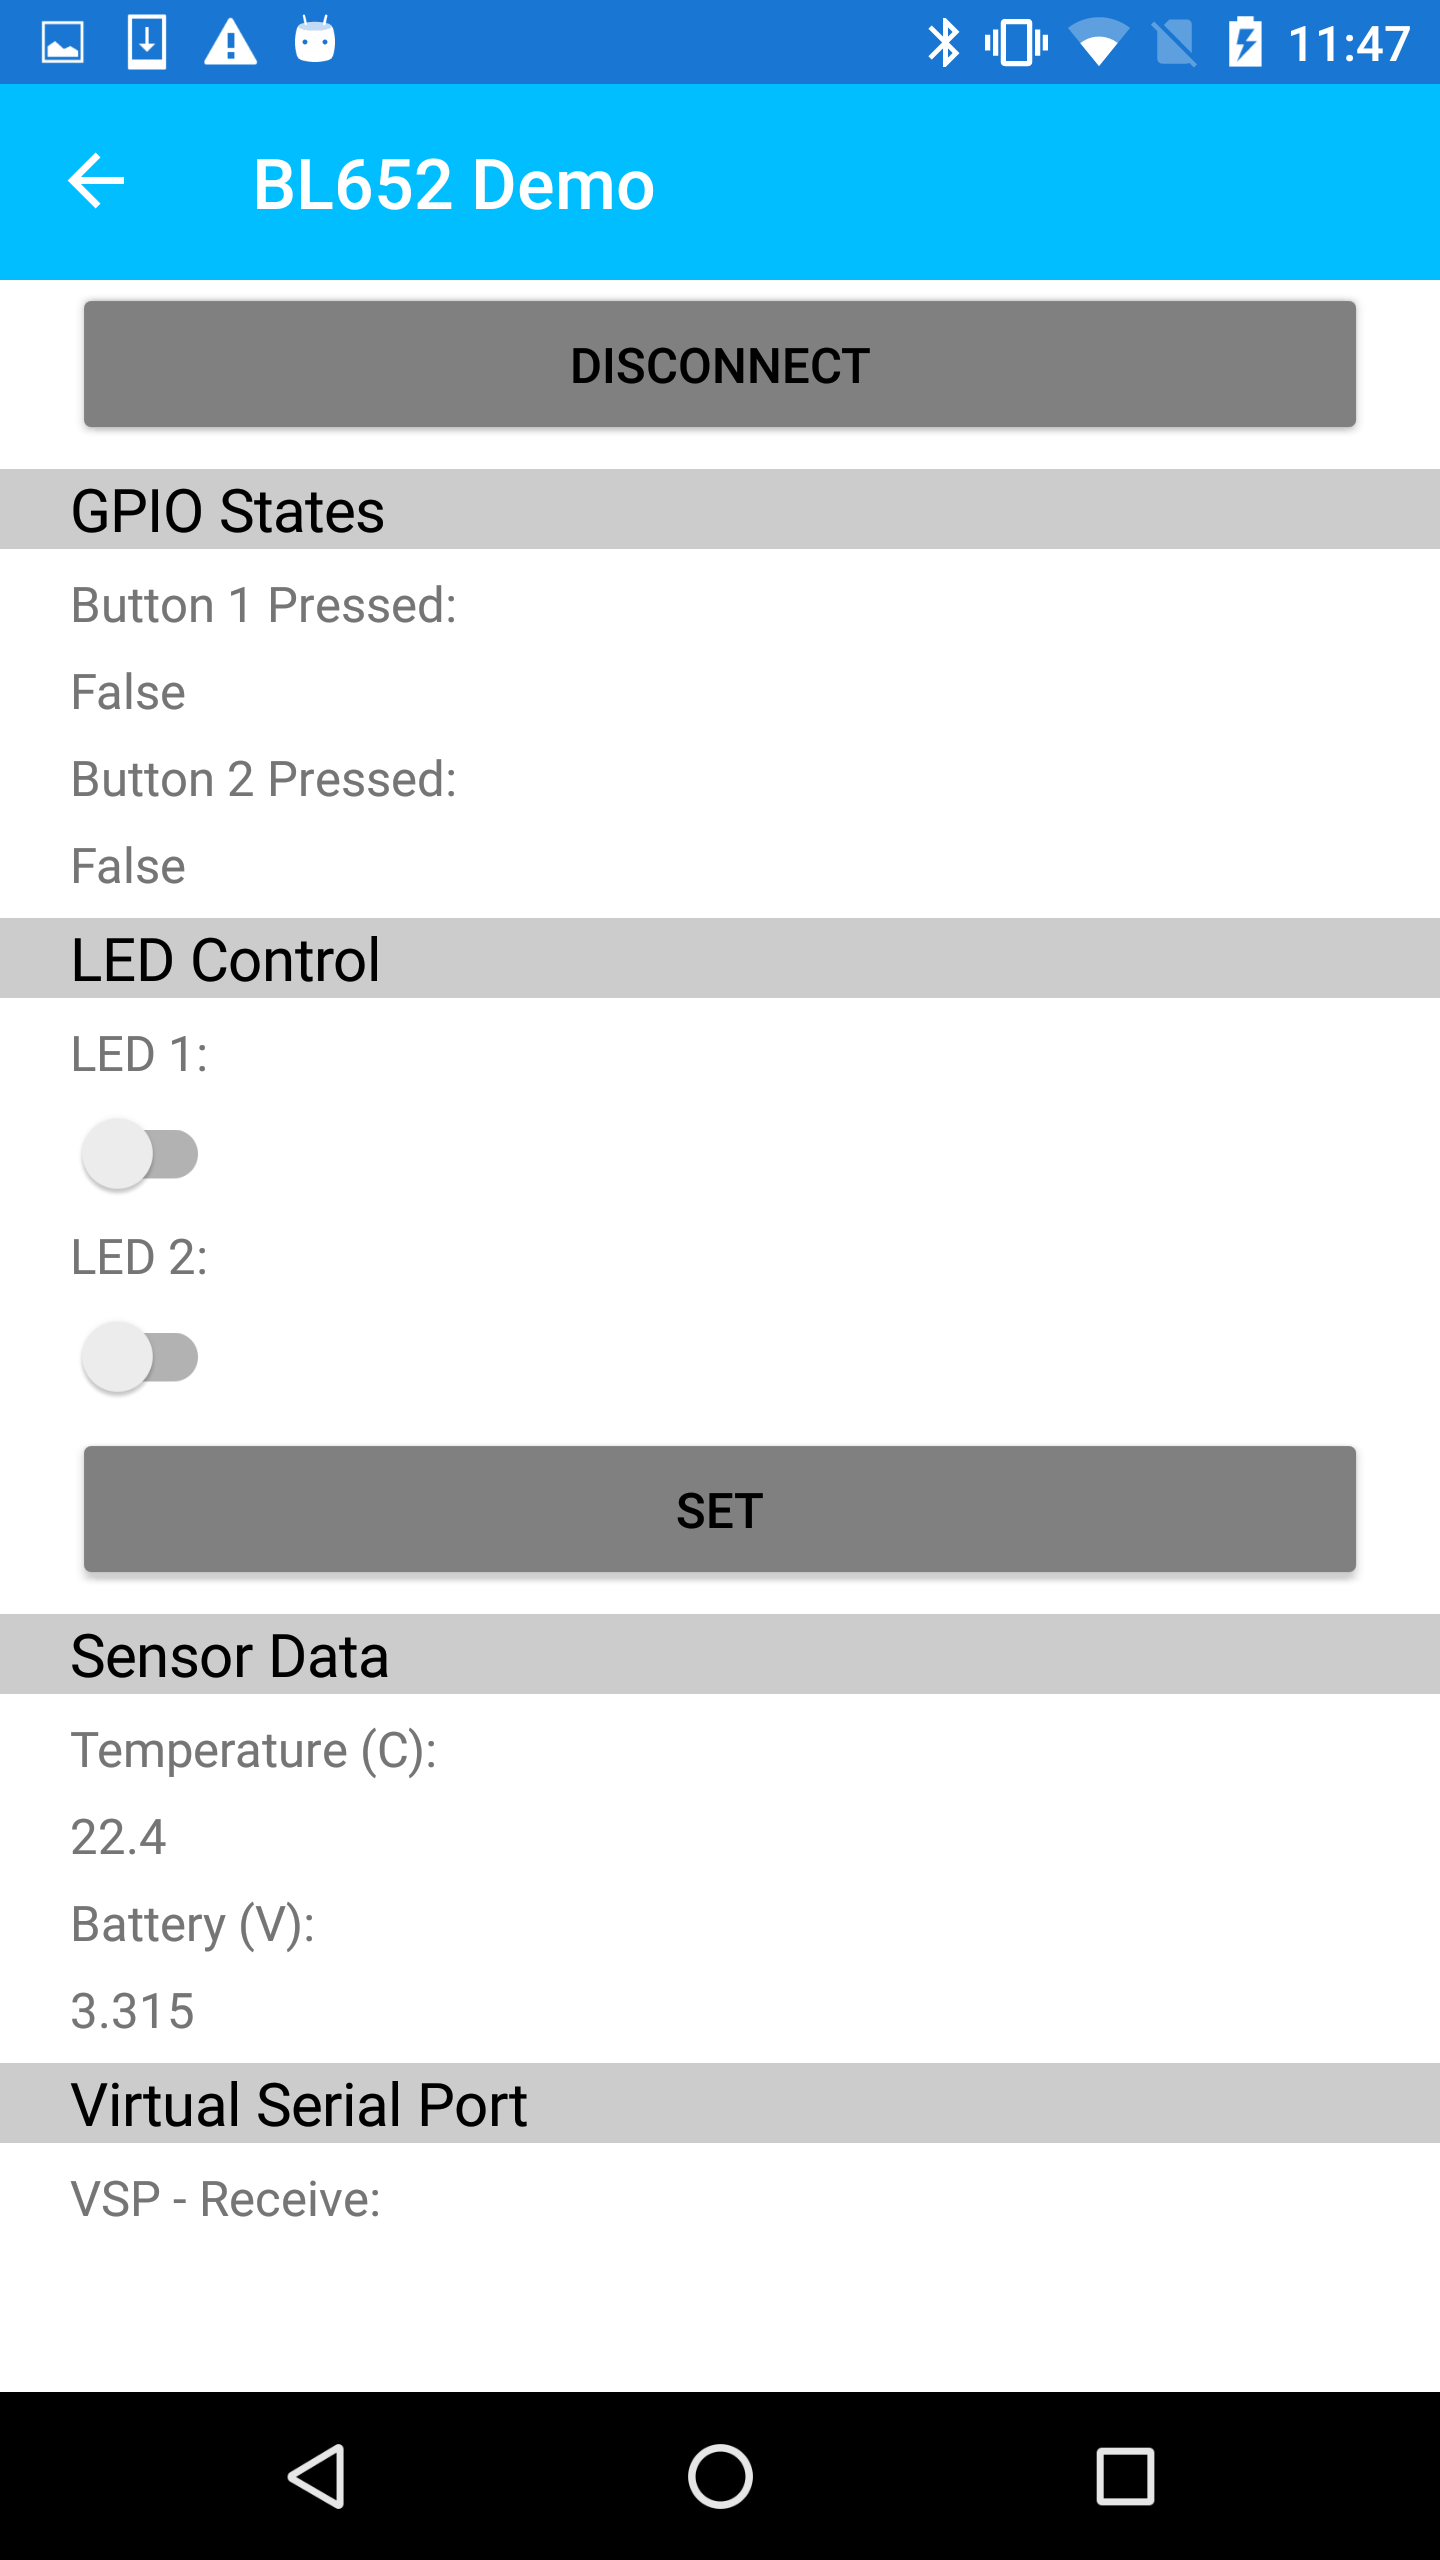
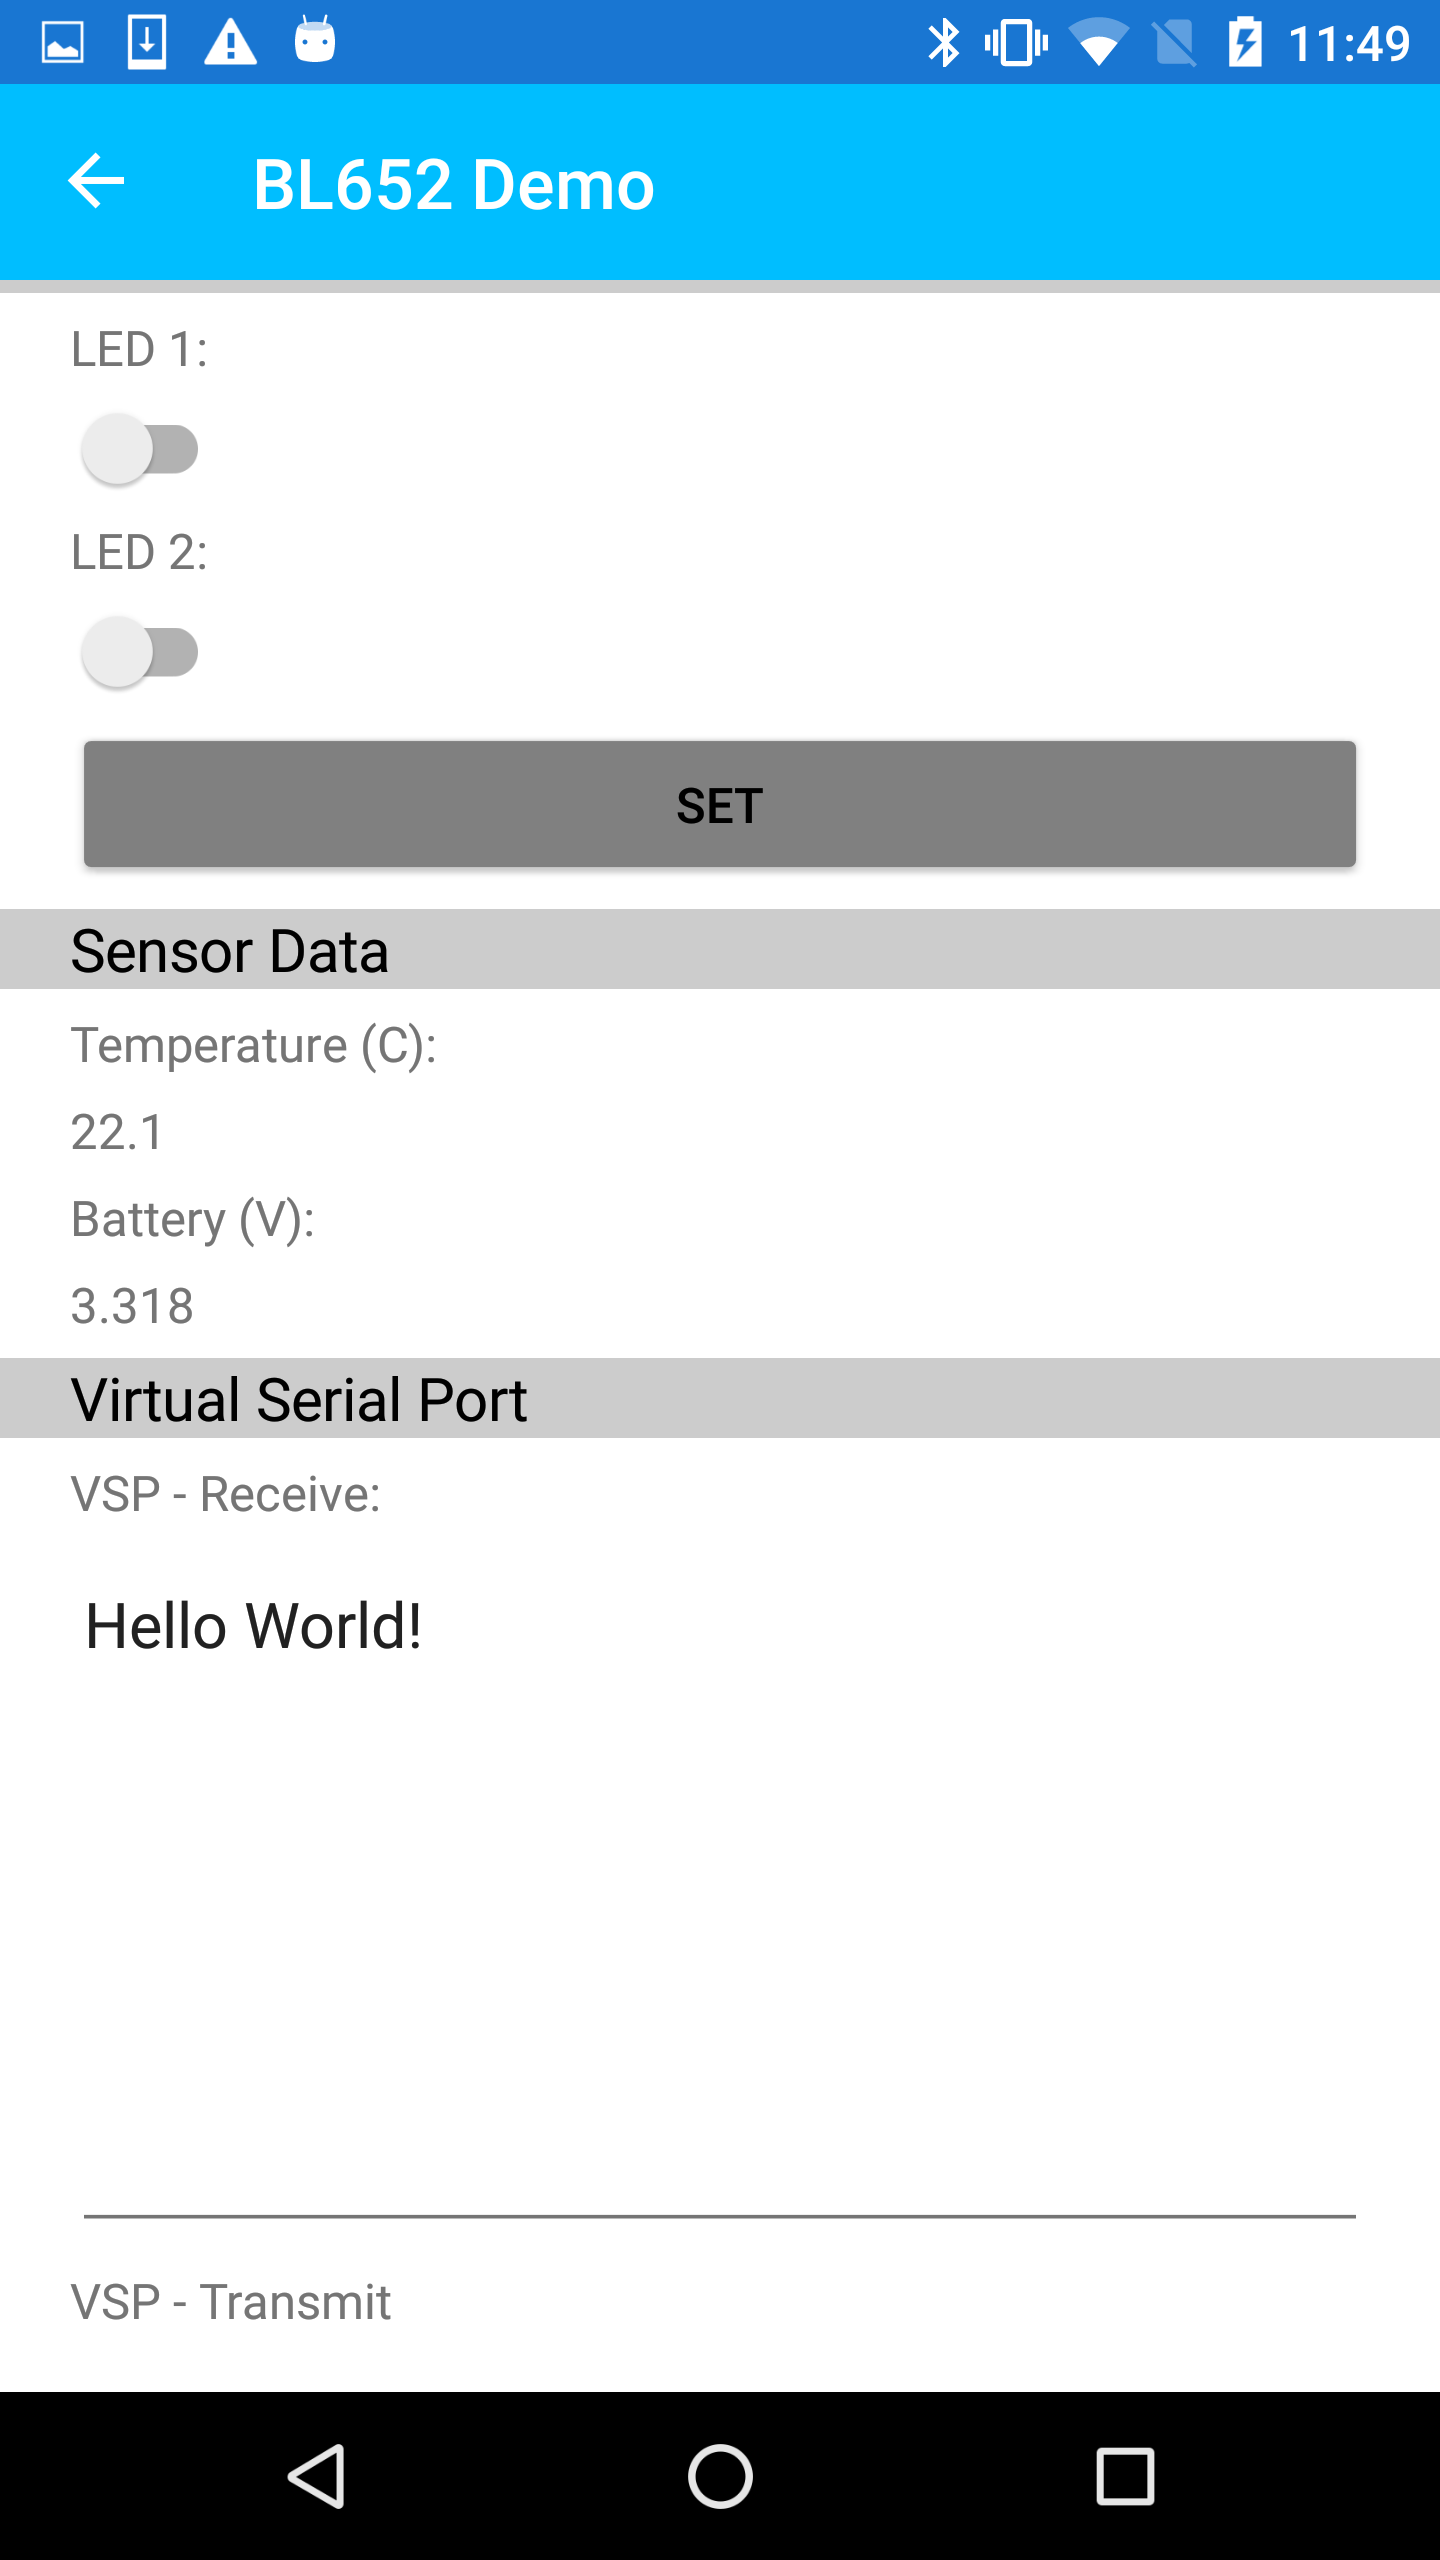
Once the screen changes to show information such as the button and LED states, all of the characteristics from your device should be reported in the mobile app. You may also change the LED button state by toggling an LED and then pressing Set.
7. Communicating over vSP
To send Virtual Serial Port data from the phone to UwTerminalX tap the VSP - Transmit field. A keyboard will show. Enter the text you would like to send.
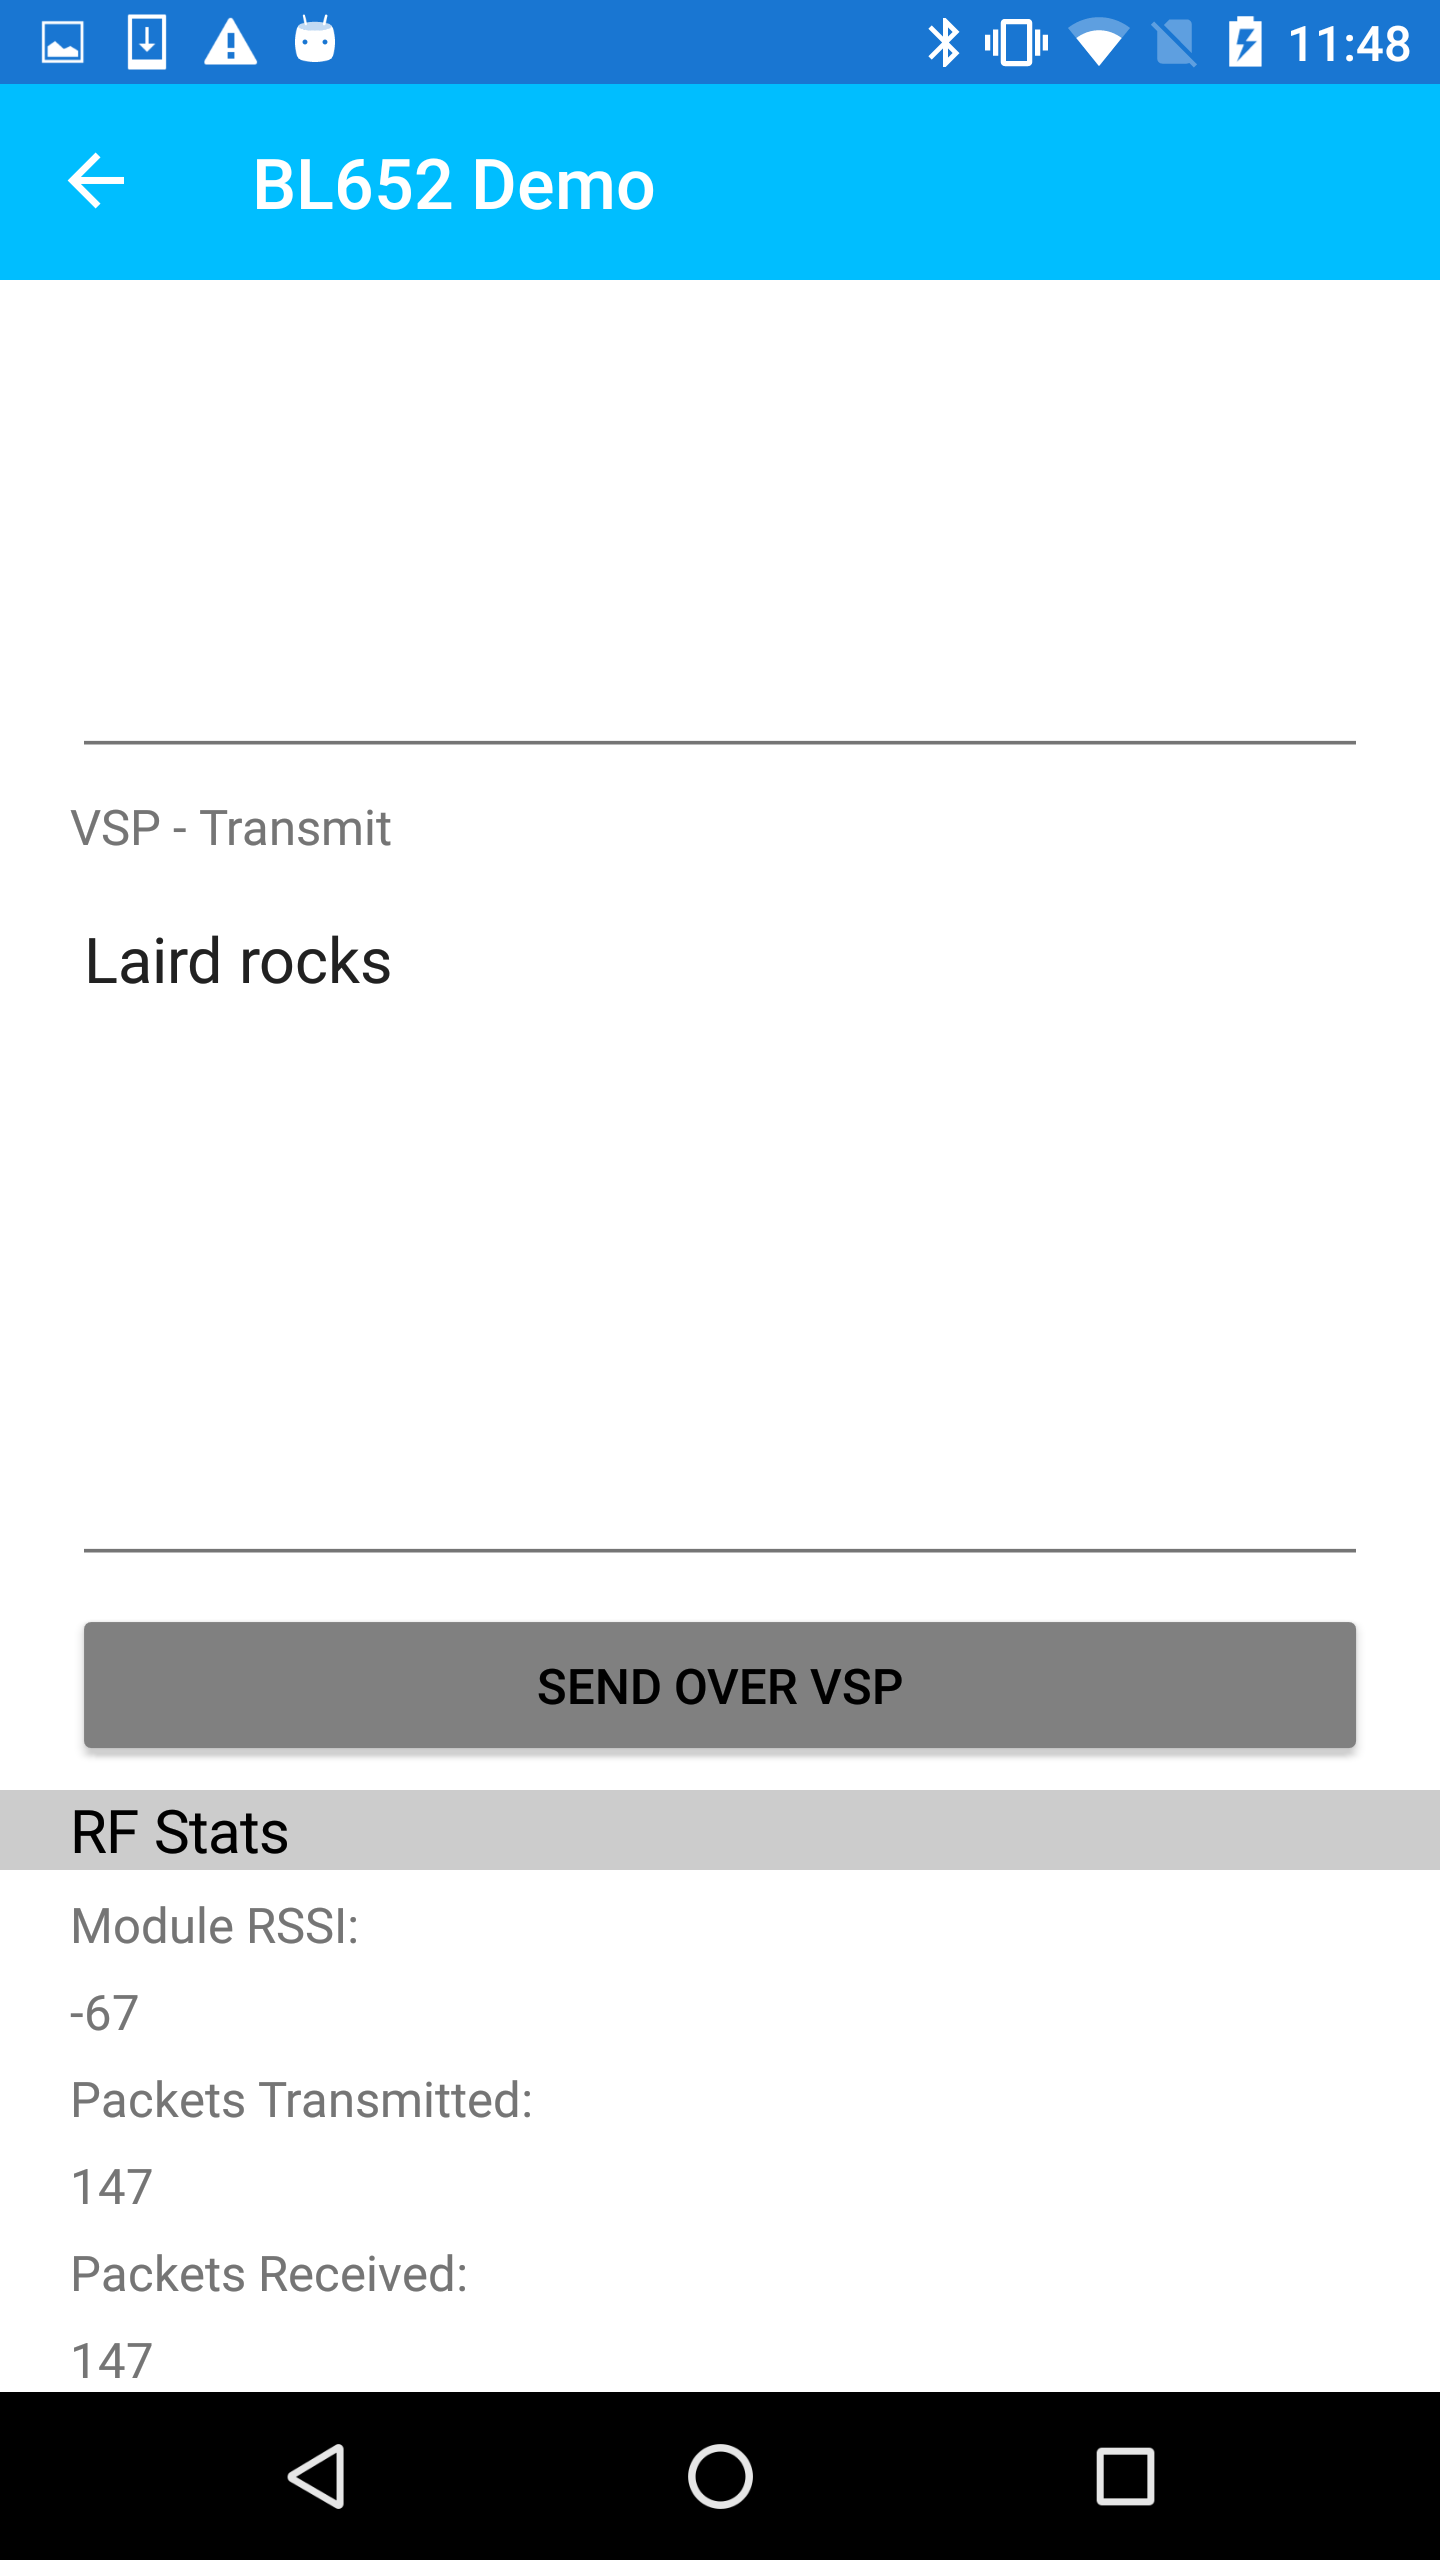
Minimize the keyboard and tap Send Over VSP and the data will be sent via BLE to the DVK-BL652.
The data should now be visible in UwTerminalX. Note that all lines beginning with # are debugging messages from the smartBASIC application designed to aid better understanding of the source code of that application.
To send Virtual Serial Port data from the module to the phone/tablet enter data in UwTerminalX and press Enter.

The data will now be visible on the mobile app.
8. Using the DVK-BL652 Sensors
The following buttons, sensors, and data may be read and controlled between the DVK and the Serial-to-BLE app:
Phone and Module RSSI - The RSSI values represent the signal strength both from the phone/tablet to the DVK-BL652 and the module to the DVK-BL652. If you move your phone/tablet away from the DVK-BL652 you should see these values change.
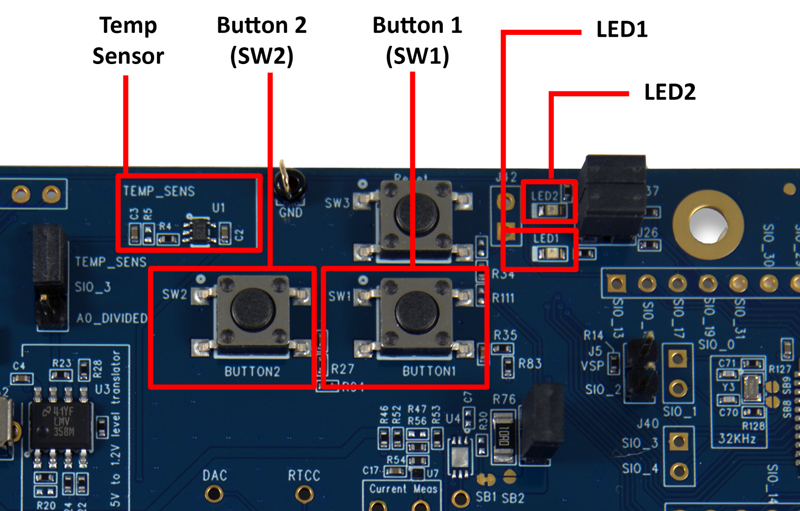
Button1 and Button 2 Status - If you press button 1 or button 2 on the device, you will see these values change from “Unpressed” to “Pressed”.
LED1 and LED2 - By using the toggles/switches in the app you will be able to turn LED1 and LED2 on the DVK-BL652 on and off.
Temperature Sensor - The temperature sensor displays the temperature from the DVK-BL652 in Celsius. If you blow on the device you should be able to see this value change in the mobile app. Please ensure the jumper is fitted to connect TEMP_SENS to SIO_3; otherwise the temperature will be reported incorrectly.
Battery - The DVK-BL652 also reports the current voltage coming from the battery.
RF Statistics - Every time a packet is sent from the device the "Packets TX'd" should increment. Every time the phone receives one of these packet number updates "Packets RX'd" should increment by one. As the device gets further away from the phone, these numbers may stop incrementing, step back in range and they should begin to increment again.
9. Disconnecting from the DVK-BL652
To disconnect from the device, tap Disconnect.

10. Loading Different smartBASIC Applications
In order to load different smartBASIC applications, the BL652 needs to be placed into interactive mode. To do this, complete the following steps:
1. Change the J12 jumper position from pins 2-3 to pins 1-2.

2. In UwTerminalX, make sure the DTR checkbox on the Terminal tab is unchecked.
3. Press the reset button on the module (or on UwTerminalX, check and uncheck the BREAK checkbox which results in a reset of the module).
When you have completed these steps, you can check in UwTerminalX that the device is in interactive mode by typing at and hitting Enter. When in interactive mode, the terminal echoes 00.
Now that the DVK-BL652 is in interactive mode, you may compile, load, and run applications by right-clicking the terminal window and selecting XCompile+Load+Run.